After years of hacking Apple‘s famous Mac OS X, I now have two successful “Hackintoshes” running on budget hardware and we’re fully dual- and tri-booting Mac OS X on the same hard drive. This has to be one of the most exciting releases to the OSx86 community to date.
A little history: I started on the infamous “deadmoo” VMWare image of 10.4.1. This was probably one of the first quality releases showing a functional Mac OS X on Intel hardware. Yes, this was before the days of the Intel Core Solo Mini or any Intel-based Mac you could get your hands on. After buying a ton of upgrades to make VMWare Workstation (Windows XP SP2) manageable to run the first glimpse of OS X, I copied it over to a live partition and started the grueling process of booting natively.
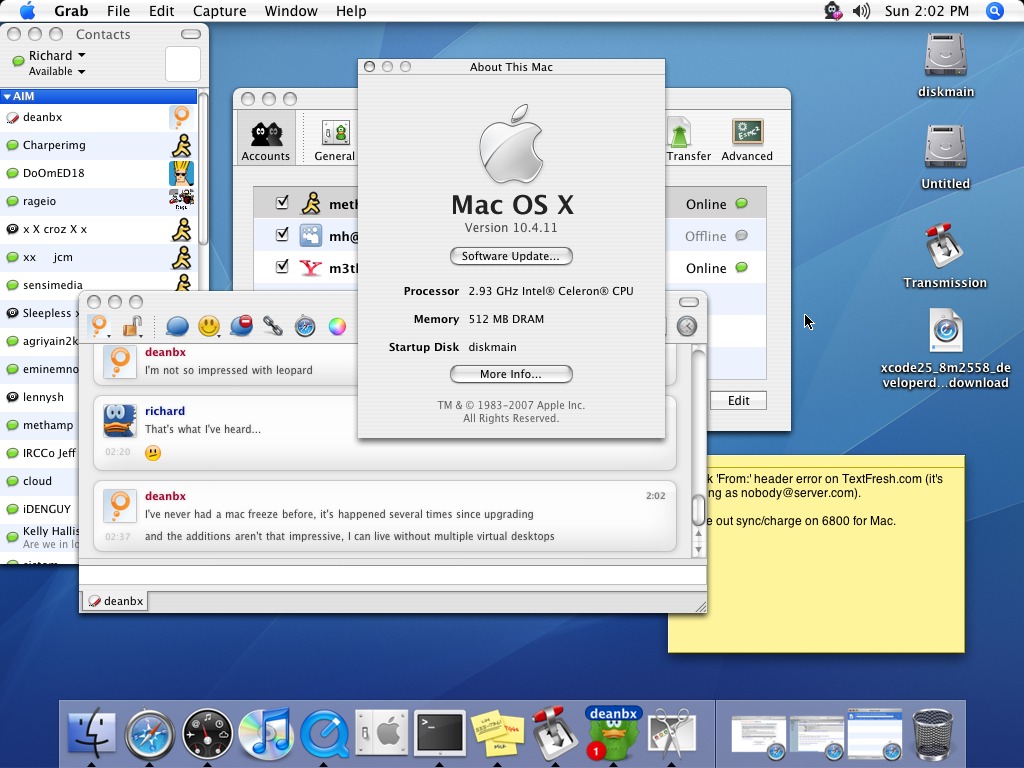
I succeeded after many late nights and ran Mac OS X 10.4.1 until the ‘JaS’ release of Mac OS X 10.4.8. This was probably one of the better Mac OS X Tiger releases and people are still running it today. I quickly tried forcing all the upgrades I could on 10.4.8 until it finally broke. After surfing around the usual forums and torrent sites, I ran across a personl calling himself “mac.nub” and he had just released a very sought after 10.4.10 with all the toys.I had a lot of trouble with Mac OS X 10.4.10 (mac.nub). After fighting with kernel panics and graphics issues, I went back to 10.4.8 (JaS) until the release of Mac OS X 10.4.11 (XxX) which I’m still running today with all the updates, including iTunes 7.5, Safari 3, etc.
People started playing around with beta copies of Mac OS X Leopard (10.5.0) and reported mixed success. Even on some “real Macs” users were complaining about Leopard freezing, crashing, and being incompatible with popular software and hardware configurations upon its release Oct. ’07. Leopard also left a lot of older Mac users in the dust due to its higher requirements.
My Hackintosh was running quite poorly (Yes, I know 512MB of RAM is part of the problem) after using it for a while. With a ton of applications running, and trying to squeeze Photoshop CS3 and Dreamweaver CS3 on there was a challenge. After running XBench and a couple other tools, I realized my disk read/write speeds were horrible. Also, my 20X DVD Writer was stuck burning at 5X to 8X which made things worse.
I decided to leap on to Mac OS X Leopard.
I rounded up another hard drive, a 120GB Western Digital I pulled out of my Wife’s Compaq SFF (Thanks, hun.) and downloaded a copy of Mac OS X 10.5.1 (Kalyway) which included ToH Kernel, Vanilla Kernel, and Vanilla ACPI Fix. After burning the small, hacked up image to a DVD-R I was ready to roll. I made sure the hard drive was Primary Master, did a quick check of my BIOS settings and rebooted to a long wait for the installation GUI to appear.
After partitioning the whole drive to HFS+ I selected it for installation, made sure it ran the disk check to double-check everything even though the checksums for both the archived Leopard and the ISO file were correct, and waited approx. 45 minutes for it to finish. It displayed incorrect “time remaining” but I had a similar issue with OS X Tiger. No big deal. It automatically rebooted itself after the installation was completed and I received a “b0 error.” I completely forgot to click ‘Customize’ just before the installation and select some drivers and options. I decided it was best to start over. I re-formatted the drive, selected Vanilla + Vanilla ACPI, Nvidia drivers (Natit) for QE/CI support, and EFI MBR since I formatted the whole drive.
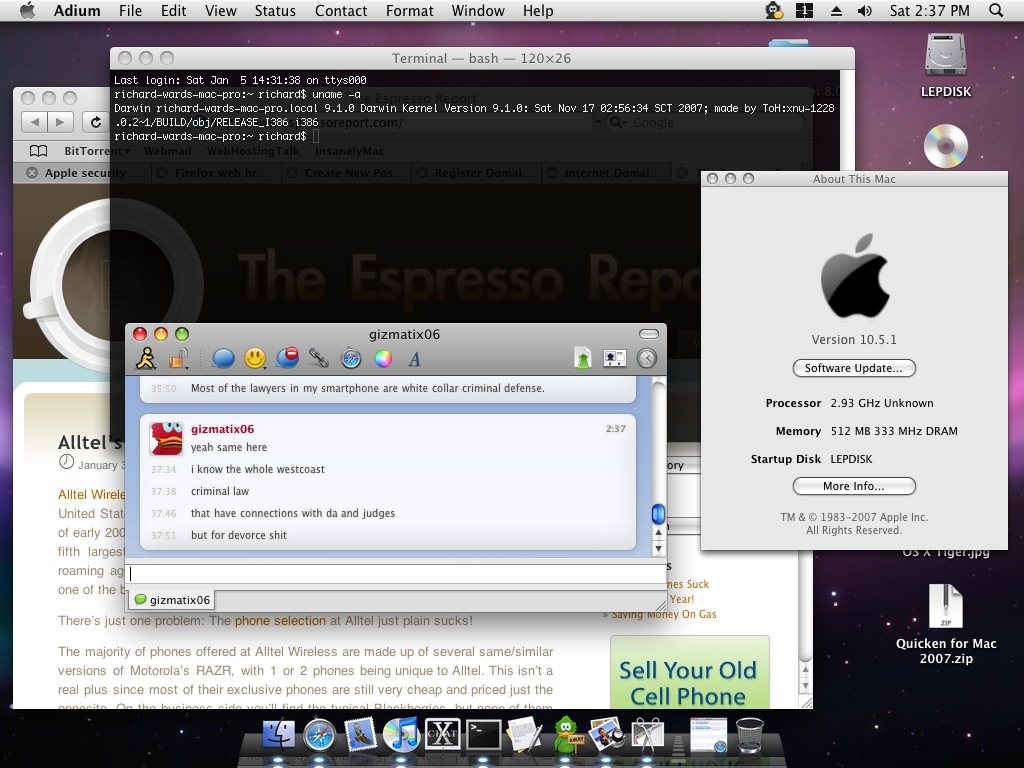
After another 45 minutes or so, I saw the boot loader. Woohoo! After running with boot option “-v” so I could see what’s going on, it ran the normal kexts and such until about 35 seconds later when it automatically rebooted without warning. The messages flash on the screen so fast that I couldn’t read the last few lines before it decided it was time commit suicide. I video-taped the screen with my smartphone and went back in slow motion and realized it was an ACPI error. I tried forcing the location with “rd=disk0s1” to no avail. It now acted normally but when it said “Starting Darwin/X86” it’d reboot again. This was on the mach_kernel. So I tried vanilla, and no luck there either.I ended up sticking with tohkernel (ToH), which is what my 10.4.11 Tiger runs. It’s included on Kalyway’s DVD if you boot with “tohkernel -f -v” it cranked up to a welcome screen showing the Leopard logo. I quickly realized that for me, you can have either all-PS2 or all-USB. This means if you try to run a USB Mouse and PS2 Keyboard, it will for some reason stop all your PS2.
I ended up with a working mouse and no keyboard. I grabbed my half-broken G4 Graphite Keyboard (USB) and paired it with my el cheapo Walmart USB mouse (ProMicro) and off I went. After getting very frustrated with my broken keyboard’s spacebar, I decided to play around with some options until I realized that if I plug in a PS2 keyboard -AND- a PS2 mouse, it all works!
Here are some screenshots for you to drool over. You can find all the files and tools you need on your favorite torrent sites. Be sure to scope out the OSx86 Wiki‘s HCL (Hardware Compatibility List) for supported hardware before you toast your eMachines. I highly recommend InsanelyMac.com’s forums for any issues you might be having during or after the setup of your very own Hackintosh.


January 5th, 2008
Apple / Mac